PART 2: BUILDING THE BOWED ARMS AND THE BACK SLATS
RICK
BUILDS A MORRIS CHAIR
Among the more distinctive parts of this Stickley
Morris Chair project is the sweeping curves of the bowed arms and bowed back
slats. Over the years, there have been many different approaches to bowing
the arms. For instance, in some cases (first picture below) they have simply
used a scarf joint to angle the arm to suggest a bow, even though there is
no actual curve in the arm. Some builders (middle picture) have chosen to
ignore the bowed arm completely and go with a straight arm. I really like
the look of the fully bowed arm below, so I have decided to go with it.


There are also a number of different techniques for
bending the arms. The most common one, for those who have the equipment, is
to use steam bending. This approach uses a single, inch-thick slab of white
oak, which is 'cooked' inside a pressurized steam chamber for a few hours,
until it becomes plastic and pliable. It is then removed from the steamer
and clamped to a bent mold. As the wood cools, it returns to its non-plastic
state, and retains the curve of the mold when it is removed.
As it happens, I love hand-bending wood on a hot
bending iron, and I do it a lot when building musical instruments like
guitars and dulcimers, but those pieces are only tenths of an inch thick.
You can't bend a piece of wood a full inch thick on a bending iron.
I don't own a steamer, and I didn't feel like
building one for a single chair, so I decided to construct my bowed arms and
back slats using the lamination method. It works just as well, though it may
be a bit more labor-intensive, and steam burns aren't a concern!
Besides the legs, the bowed components of the chair
may be the most labor-intensive. There are a number of steps, and none of
them go very quickly. We'll begin with the bowed arms.
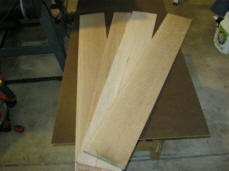
Here, I'm resawing a piece of white oak. This is called
'book-matching', which means that, when finished, you can open the two
pieces the way you open a book. These two pieces will comprise the top and
bottom faces of the first arm.
Resawing is a test of patience. Because oak is
acidic and tough, it's hard on steel blades. I usually install a brand new
one before resawing, and then replace it after I'm finished. It's slow
going, to avoid blade drift. There's just a lot of wood to hog through when
you're ripping a board edge-wise.
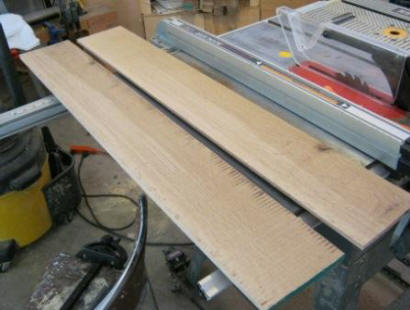
Here are the two bookmatched pieces, after resawing.
As I mentioned, these will be the top and bottom
sides of the arm. The only problem is that, after smoothing and cleanup,
they'll only be a quarter-inch thick, and the arm is an inch thick. That
means we need to find another half-inch of thickness somewhere.
Here's the answer! Remember the red oak filler bars I
used on the chair legs? Well, it's back to Home Despot!
I purchased a number of .25"x 4" by 48" pieces of red
oak. Red oak will work fine in the center laminations of the arm, because
their faces won't be visible, and there is very little visual difference
between the end grain of red oak and white oak.
I couldn't find a six-inch wide piece of .25" thick
red oak at the home store, so I have to join two four-inch thick pieces. I
do this all the time when building backs and tops for guitars and dulcimers.
In fact, I already had the joining board built. I used my dulcimer joining
board and wedge clamps to glue the two strips of red oak together.
After removing the joined red oak filler laminations
from the joining board and letting them cure for a day (just to be safe), I
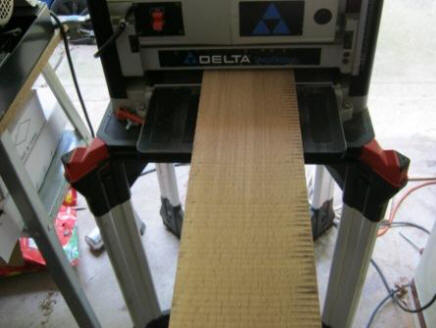
thickness the laminations for the first bowed arm using my planer. They all
go to a quarter-inch thick each.
Below is a picture of the four laminations after
thicknessing. Now they're ready for glue-up.
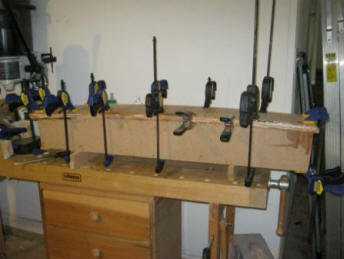
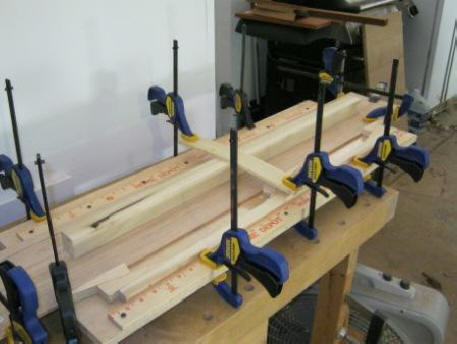
I've layered the laminations, putting the face with
the most dramatic ray fleck on top, and here I've glued them up on the bowed
arm mold.
This is how glue-laminations work. I use the same
expanding urethane glue that I used on the legs. It has a long open working
time, and it's pretty slippery. I glue up each of the four laminations, and
as they bend over the arch on the mold, they slide along each other's faces.
Then I clamp them down, and let them dry for about twenty-four hours. Once
the glue dries, it becomes rigid, and maintains the tension between the
laminations, which holds the bowed shape. There is almost no spring-back.
I use urethane glue because it is strong,
heat-resistant, and moisture-resistant. I know my laminations won't separate
over time. It also expands like crazy, which means a ton of squeeze-out,
some of which you can see in the picture above. Because of that, I make the
arms about a half-inch wider and about two inches longer than the plans call
for, because I know I will need to trim them.
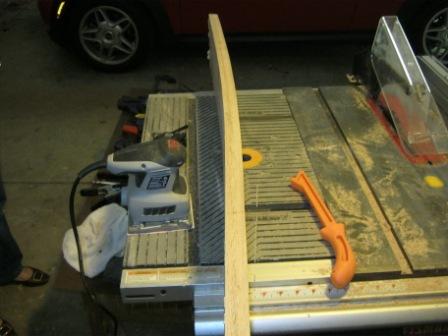
After trimming as much glue squeeze-out as I can
with a good sharp chisel, I run the arms through my table saw to trim them
to within about an eighth-inch of their final width.
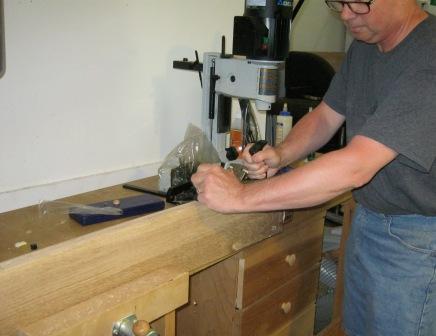
Hey, it's not all power tools!
I do know how to use hand tools, and this is a good
time to use them.
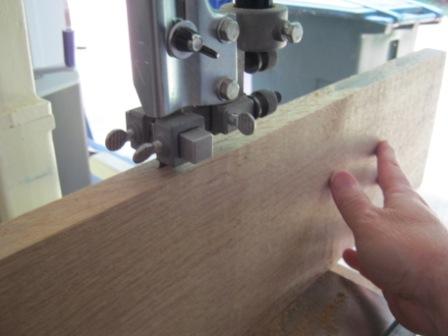
I clamp the laminated bowed arm into my bench vise,
and use a bench plane to smooth the table saw marks off the side grain.
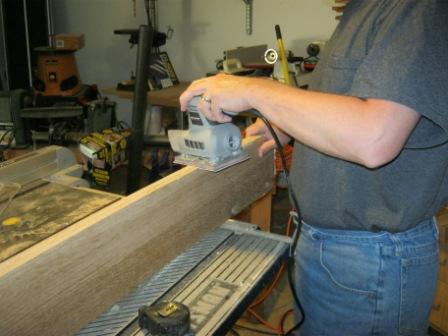
Below, I finish the job with a palm sander.
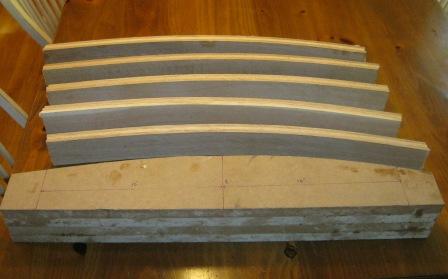
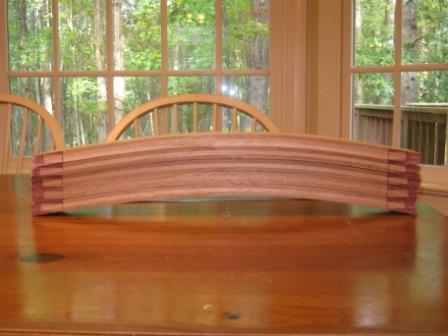
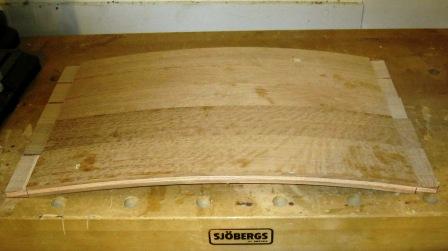
The finished bowed arm, except for trimming the ends
for length. Because of the urethane glue, it will hold this bowed shape
almost indefinitely. And, remember what I said about not being able to see a
difference between the white oak and red oak end grain? See if you can find
the glue lines in these laminations. Looks like a solid bent board.
The process for building the bowed back slats for
the chair is very similar, except for cutting the tenons.
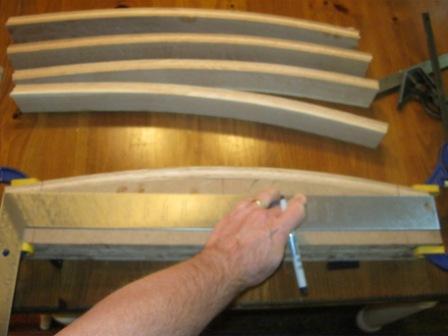
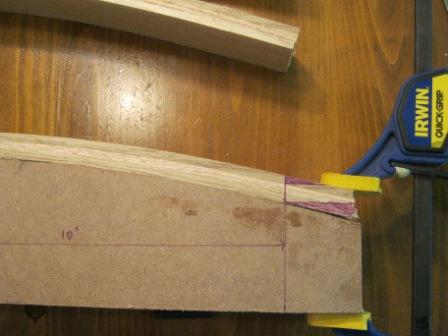
Here are the back slats, after laminating, gluing, and
trimming. Below the slats is the form on which they were laminated. In this
case, the form does double duty as a squared marking tool for forming the
tenons. Note that I've marked the center point of the form, and then I've
added two parallel vertical lines exactly 10 inches equidistant from the
center line. These parallel lines are used to mark the first reference lines
for the tenons
I find the midline of a back slat, and mount it to the
form with bar clamps, with the midline of the form and the midline of the
back slat forming one continuous line.
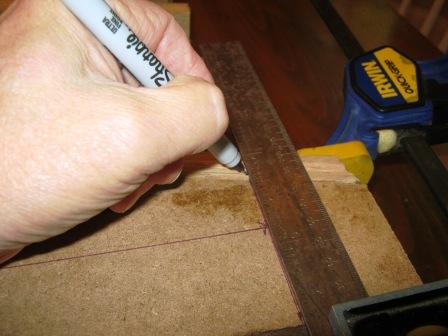
Next, using a carpenter's square (another tool I
inherited from my father) I draw a vertical line on the side of the back
slat, exactly ten linear inches from the center line. I repeat the process
on the other end of the slat.
Sorry for the fuzzy picture here, but it looked
clearer when I took it.
Using a good straightedge, I connect the two lines
and draw a horizontal line from the vertical mark to the end of the back
slat tenon on each end of the slat. This will be the eventual front of the
slat tenon.
Here, I've drawn a horizontal parallel line one half
inch above the line I just drew in the previous picture. This line
designates that back edge of the tenon. I've colored in the waste, so you
can see what the tenon will look like when I've finished it.
I repeat it on the other end of the tenon.
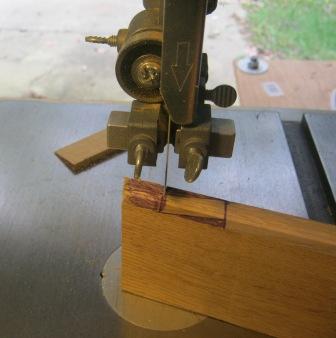
Here are all the back slats with the tenons marked.
Now it's on to the bandsaw to cut away the waste!
After bandsawing, you can see the result. The tenons
lie flat, which means that they should fit nicely into the mortises I'll cut
in the rails of the chair back.
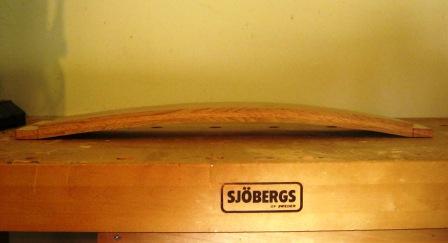
Below is a picture of all five back slats with
tenons cut, lying top to bottom on the workbench. Now it's on to building
the back rails, and mortising and tenoning the rest of the frame of the
chair.